
はじめに
今回は、固定ページの子ページ一覧を表示するカスタマイズを行います。
ウィジェットで使用できるようにしてみました。
例えばコーポレートサイトや、マニュアルサイトでも便利に使えると思います。
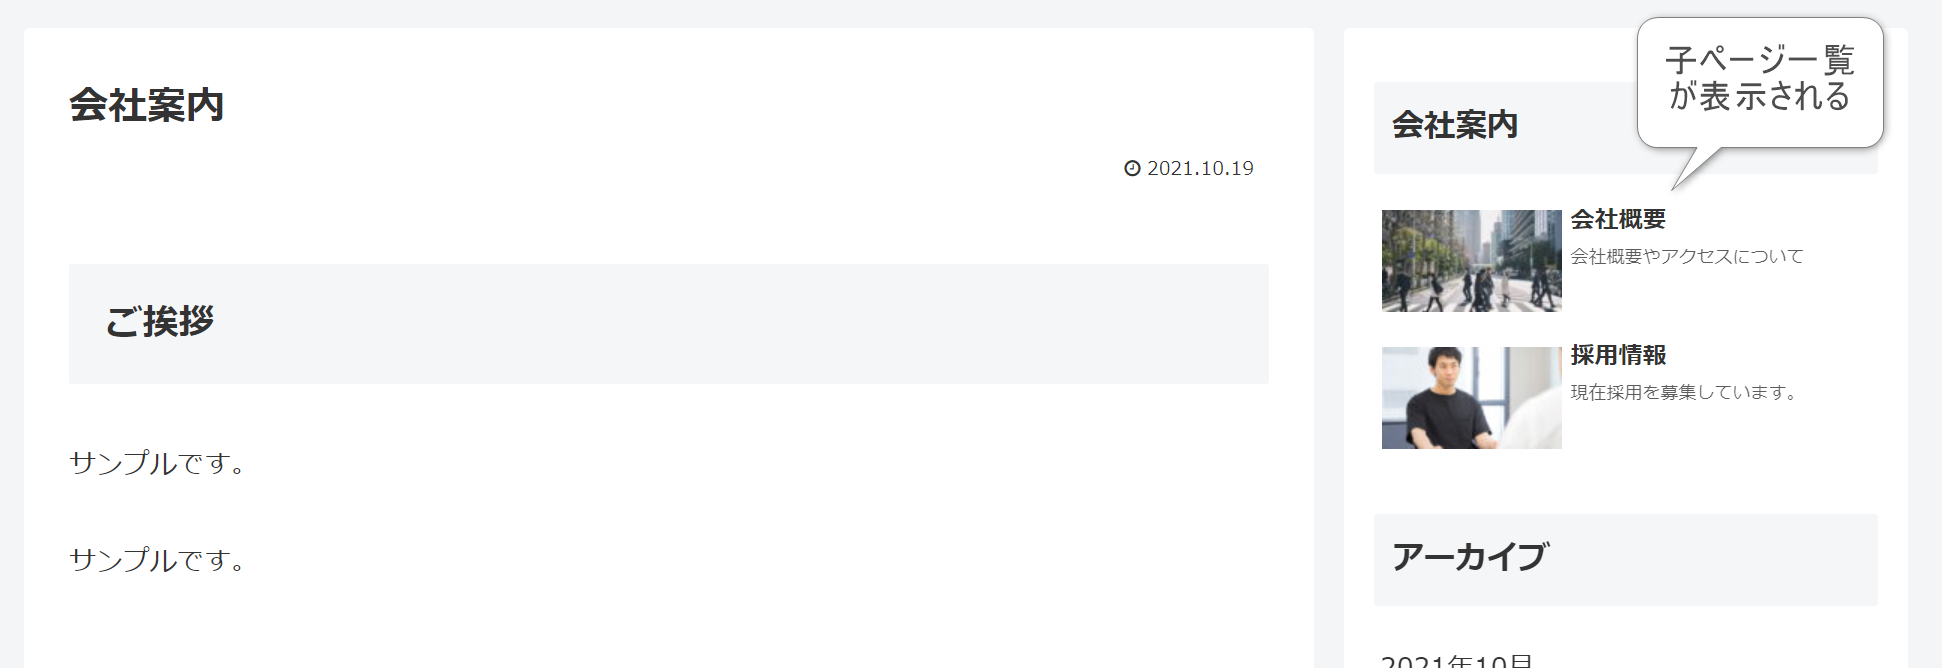
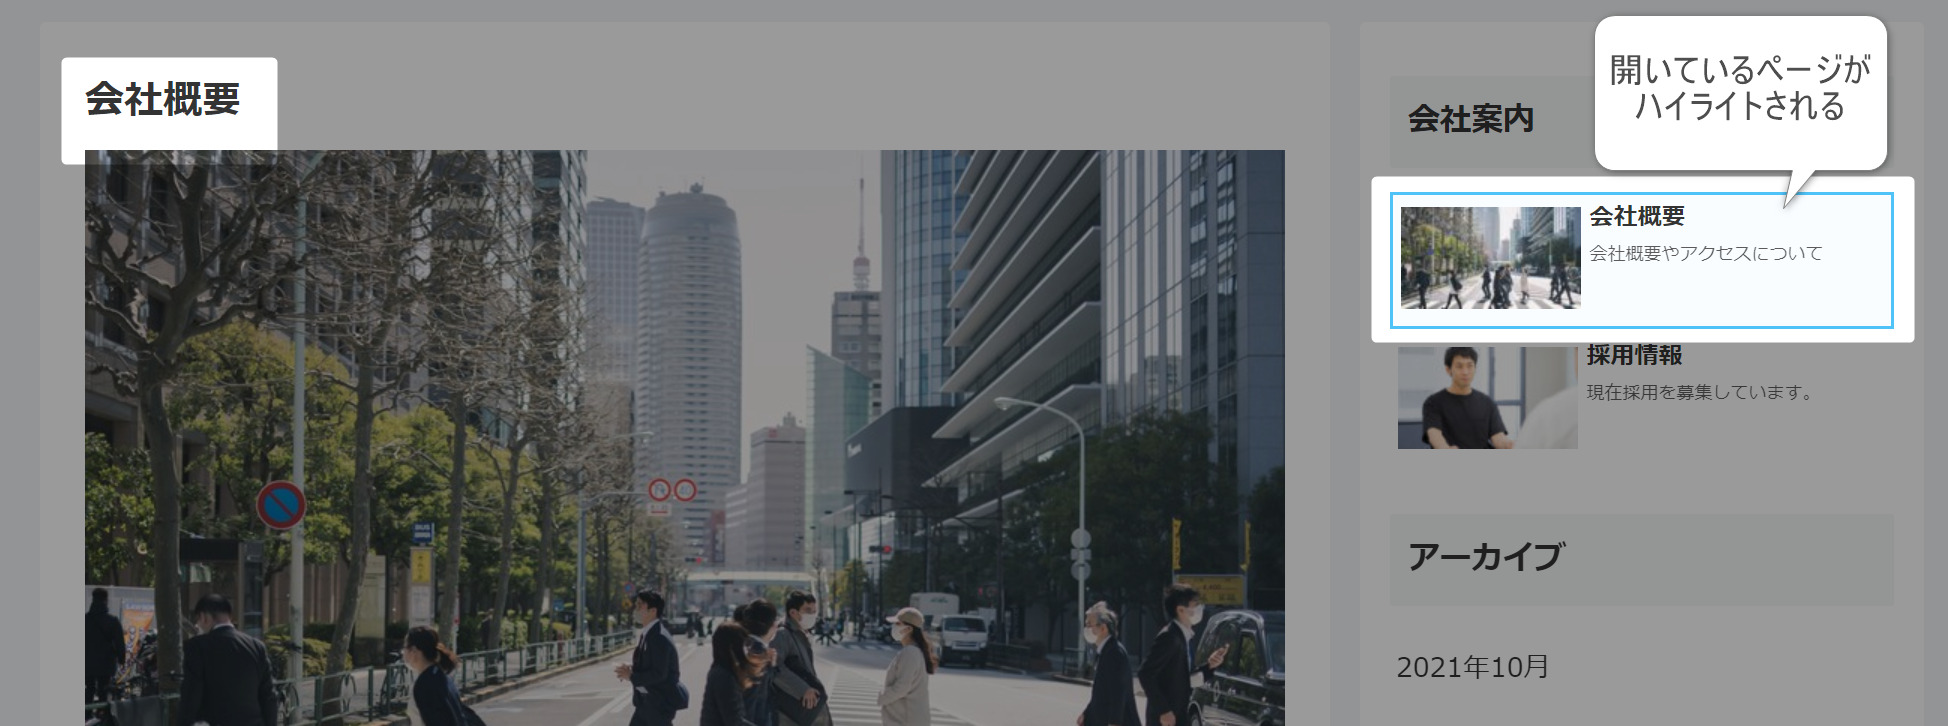
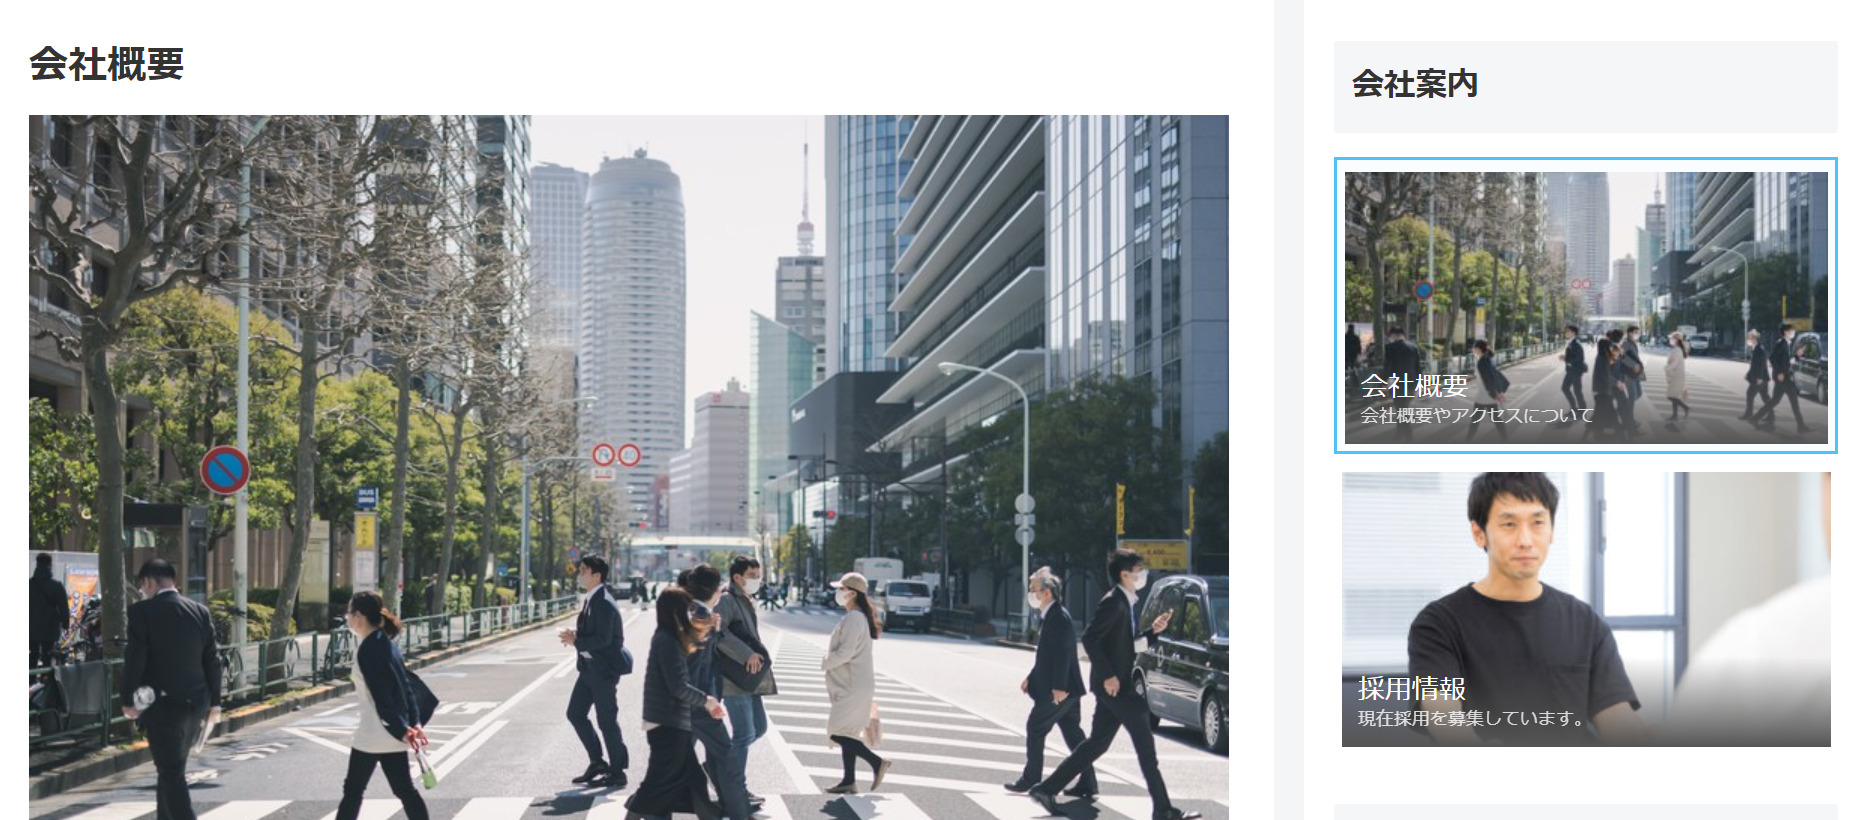
このように、サイドバーに固定ページの子ページの一覧を表示するようにしてみます。
イメージとしては、Cliborのサイトをご覧ください。
他にも私のブログで、WordPressについて解説している記事がありますのでご覧ください。


子ページリスト仕様
固定ページにて、子ページの一覧を表示するウィジェットを作成します。
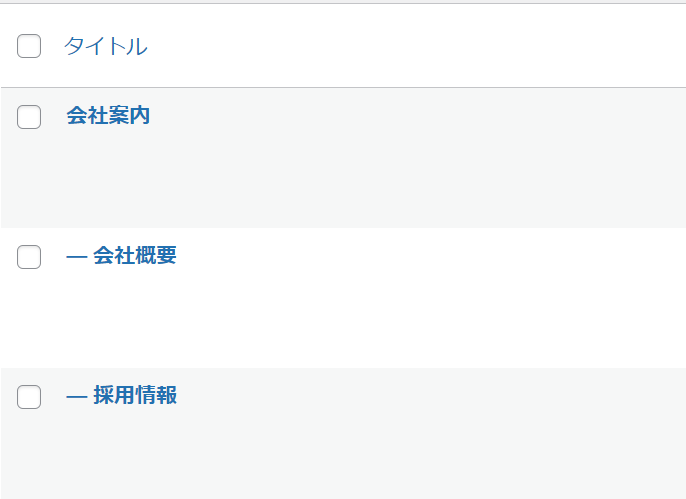
まずは、以下のように親子の固定ページを作成したとします。
ウィジェットでは以下のように、子ページの表示を設定できるようにします。(ナビカードと同様)
子ページを持つ固定ページを表示した場合、サイドバーに子ページ一覧が表示されます。(または親ページを持つ子ページを表示した場合)
ウィジェットのタイトルは、親ページのタイトルが設定されます。
子ページを開いている場合、現在開いているページのカードをハイライトします。
Cocoonのインストールについて
Cocoonのインストールについては、以下の記事を参考にして下さい。
参考ウィジェットの確認
Cocoonの既存のソースで、参考になるものがないか探します。
今回は「ナビカード」を参考にしました。
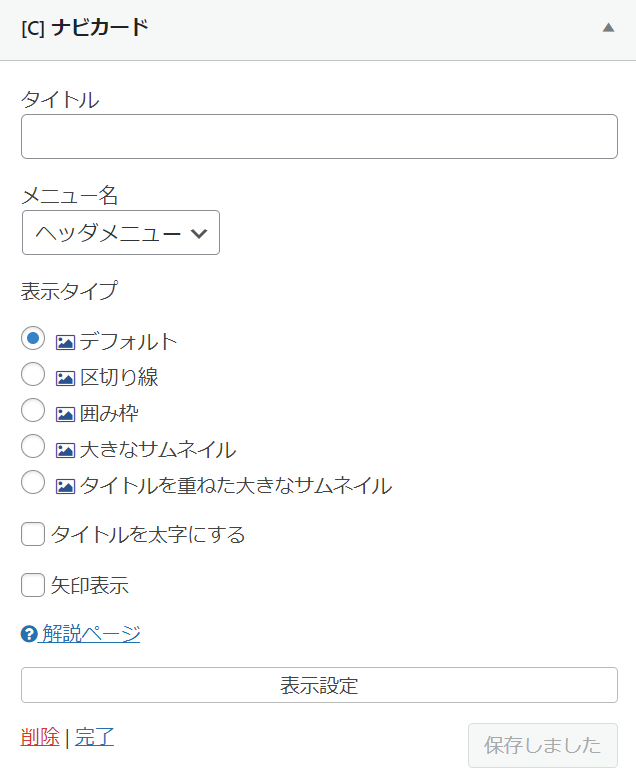
該当のソースは以下です。
今回は、このソースを参考にしながら進めていきたいと思います。
\cocoon-master\lib\widgets\navi-entries.php
それでは早速、オリジナルのウィジェットを作成していきましょう。
子ページ一覧ウィジェットの作成
ソースの全容は最後に再掲しますが、順番にソースを見ていきましょう。
子テーマのfunctions.phpを開きます。
これ以降のソースコードは、全てfunctions.phpに追記していきます。
\cocoon-child-master\functions.php
ウィジェットの作成
まずは管理画面で配置できるウィジェットを作成しましょう。
まずは最低限のウィジェットのコードを記述します。
add_action('widgets_init', function () {
  register_widget('ChildPageWidgetItem');
});
class ChildPageWidgetItem extends WP_Widget
{

  // ウィジェット名などを設定
  function __construct()
  {
    parent::__construct(
      'child_pages',
      WIDGET_NAME_PREFIX . __('子ページカード', THEME_NAME),
      array('description' => __('子ページリストを表示するウィジェットです。', THEME_NAME)),
      array('width' => 400, 'height' => 350)
    ); //ウイジェット名
  }

  // ウィジェットの内容を出力
  function widget($args, $instance)
  {
  }

  // ウィジェットオプションの保存処理
  function update($new_instance, $old_instance)
  {
  }

  // 管理用のオプションのフォームを出力
  function form($instance)
  {
  }
}
このコードを記述した状態で、管理画面の外観→ウィジェットを確認してみましょう。
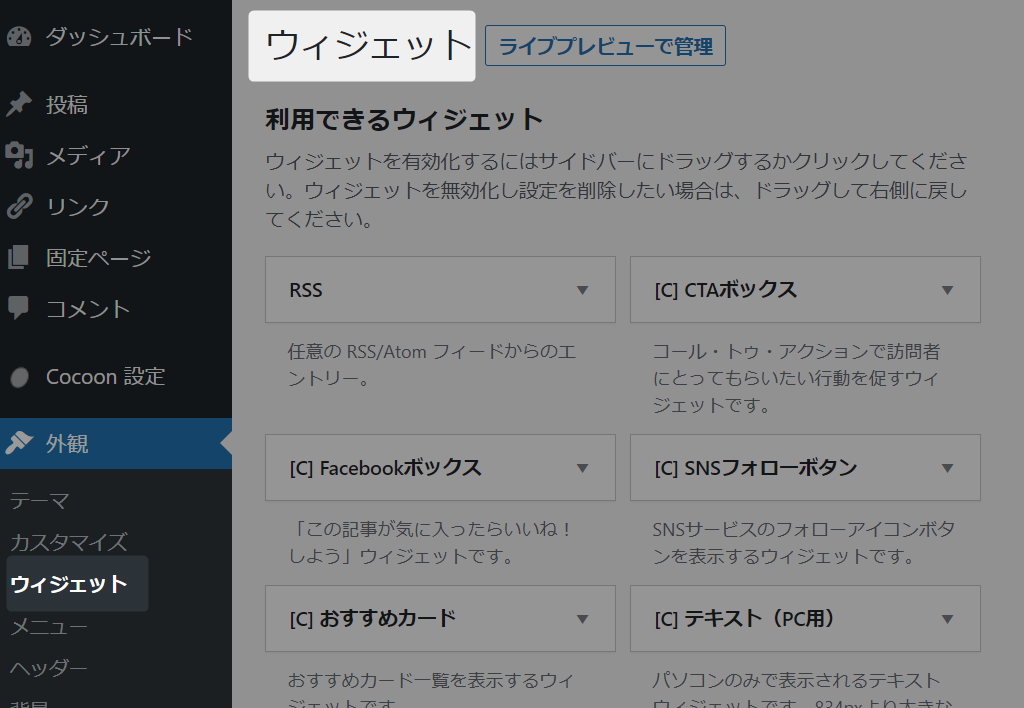
「子ページカード」というウィジェットが新たに表示されていると思います。

続いて、ウィジェットオプションのフォームを作成します。
form関数の中に追記していきます。
  function form($instance)
  {
    if (empty($instance)) {
      $instance = array(
        'entry_type' => ET_DEFAULT,
        'is_bold' => 0,
        'is_arrow_visible' => 0,
      );
    }

    $entry_type  = ET_DEFAULT;
    if (isset($instance['entry_type']))
      $entry_type = esc_attr($instance['entry_type']);
    $is_bold = empty($instance['is_bold']) ? 0 : 1;
    $is_arrow_visible = empty($instance['is_arrow_visible']) ? 0 : 1;

    // 表示タイプ
    echo '<p>';
    generate_label_tag($this->get_field_id('entry_type'), __('表示タイプ', THEME_NAME));
    echo '<br>';
    $options = get_widget_entry_type_options();
    generate_radiobox_tag($this->get_field_name('entry_type'), $options, $entry_type);
    echo '</p>';

    // タイトルを太字にする
    echo '<p>';
    generate_checkbox_tag($this->get_field_name('is_bold'), $is_bold, __('タイトルを太字にする', THEME_NAME));
    echo '</p>';

    //矢印表示
    generate_checkbox_tag($this->get_field_name('is_arrow_visible'), $is_arrow_visible, __('矢印表示', THEME_NAME));
  }
設定を更新するための処理を、update関数の中に記述します。
function update($new_instance, $old_instance)
{
$instance = $old_instance;
$instance['entry_type'] = strip_tags($new_instance['entry_type']);
$instance['is_bold'] = isset($new_instance['is_bold']) ? 1 : 0;
$instance['is_arrow_visible'] = isset($new_instance['is_arrow_visible']) ? 1 : 0;
return $instance;
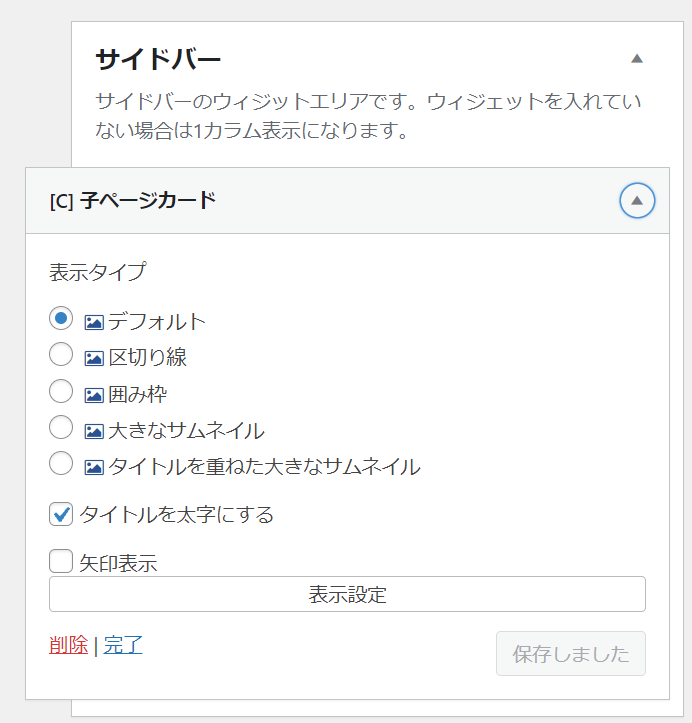
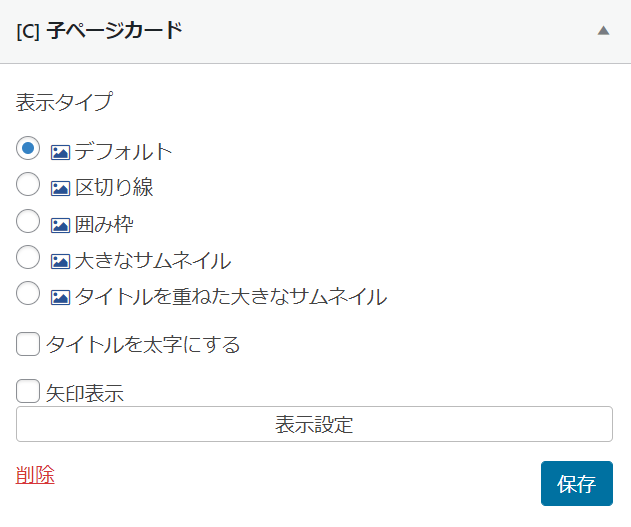
}この時点で、ウィジェットを確認しましょう。
サイドバーに配置して設定フォームを確認します。このように表示されたらOKです。
ウィジェットの表示
引き続き子ページの一覧を表示する処理を作成します。
まずはfunctions.phpに、共通関数を作成しました。
// 子ページを持っているかどうか
function has_children()
{
  global $post;
  $pages = get_pages('child_of=' . $post->ID);
  return count($pages) > 0;
}

// トップレベルのページかどうか
function is_top_level()
{
  global $post, $wpdb;
  $current_page = $wpdb->get_var("SELECT post_parent FROM $wpdb->posts WHERE ID = " . $post->ID);
  return $current_page == 0;
}

// 親ページのタイトルを取得
function get_parent_title()
{
  global $post, $wpdb;
  $post_title = $wpdb->get_var("SELECT post_title FROM $wpdb->posts WHERE ID = " . $post->post_parent);
  return $post_title;
}
次に、ウィジェットの表示の処理を、widget関数の中に追記していきます。
まずは、ウィジェットタイトルの取得処理です。
  // ウィジェットの内容を出力
  function widget($args, $instance)
  {

    // 固定ページのみ表示
    if (!is_page()) {
      return;
    }

    // ウィジェットタイトルの取得
    $title = '';
    global $post;
    $is_top_level = is_top_level();
    if ($is_top_level && has_children()) {
      // 表示されているページが親ページで、さらに子ページを持っている場合
      // 表示されているページのタイトルを取得
      $title = $post->post_title;
    } else if (!$is_top_level) {
      // 子ページの場合、親ページのタイトルを取得
      $title = get_parent_title();
    } else {
      // それ以外の場合は何もしない
      return;
    }

    // タイトルの表示
    echo $args['before_widget'];
    echo $args['before_title'];
    echo $title;
    echo $args['after_title'];

..続く

  }
ウィジェットタイトルの表示後は、一覧の表示処理です。上記の「続く」の箇所に追記します。
管理画面で設定したウィジェットの設定と、リストの作成処理を呼び出します。
    // 表示タイプ
    $entry_type = apply_filters('child_pages_widget_entry_type', empty($instance['entry_type']) ? ET_DEFAULT : $instance['entry_type']);
    // タイトルの太さ
    $is_bold = apply_filters('child_pages_widget_is_bold', empty($instance['is_bold']) ? 0 : 1);
    // 矢印表示
    $is_arrow_visible = apply_filters('child_pages_widget_is_arrow_visible', empty($instance['is_arrow_visible']) ? 0 : 1);

    // 引数配列のセット
    $atts = array(
      'type' => $entry_type,
      'bold' => $is_bold,
      'arrow' => $is_arrow_visible,
    );

    // リストの作成
    echo get_child_page_list_tag($atts);

echo $args['after_widget'];次に、リストを作成する処理「get_child_page_list_tag」を実装します。
// 子ページリスト ショートコード
add_shortcode('child_page_list', 'get_child_page_list_tag');
function get_child_page_list_tag($atts)
{
}まずは、前半部分の処理の実装です。
設定の取得と、表示されている固定ページの親ページIDを取得し、子ページの一覧を取得しています。
  extract(shortcode_atts(array(
    'type' => '',
    'bold' => 0,
    'arrow' => 0,
    'class' => null,
  ), $atts, 'child_page_list'));

  if (is_admin() && !is_admin_php_page()) {
    return;
  }

  // 固定ページのみ表示
  if (!is_page()) {
    return;
  }

  // 親ページのIDを取得
  global $post;
  $post_parent = -1;
  $is_top_level = is_top_level();
  if ($is_top_level && has_children()) {
    // 表示されているページが親ページで、さらに子ページを持っている場合
    // 表示されているページのIDを取得
    $post_parent = $post->ID;
  } else if (!$is_top_level) {
    // 子ページの場合、親ページのIDを取得
    $post_parent = $post->post_parent;
  } else {
    // それ以外の場合は何もしない
    return;
  }

  // 子ページの一覧を取得
  $children = get_posts(
    array(
      'post_parent' => $post_parent,
      'post_type'   => 'page',
      'orderby' => 'menu_order title',
      'order'   => 'ASC',
      // 件数を指定
      'posts_per_page' => 9999,
    )
  );

  if (!$children) {
    return;
  }

..続く
次に後半部分の実装です。
子ページの情報を元にリストを作成します。
表示されている固定ページと、メニュー一覧のカードが同じ場合は、ハイライトしているところがポイントです。
  $tag = null;
  foreach ($children as $child) {

    // 記事のディスクリプションを取得
    $description = get_the_page_meta_description($child->ID);

    // 画像取得用のパラメータ
    $img_obj = (object) [
      'object_id' => $child->ID,
      'object' => $child->post_type,
      'url' => get_permalink($child->ID),
    ];
    $image_attributes = get_navi_card_image_attributes($img_obj, $type);

    // 現在表示している固定ページIDとメニューが同じ場合はハイライトする
    $classes = array();
    if ($child->ID == $post->ID) {
      $classes[] = 'navi-entry-cards-link-selected';
    }

    // アイテムタグの取得
    $atts = array(
      'prefix' => WIDGET_NAVI_ENTRY_CARD_PREFIX,
      'url' => get_permalink($child->ID),
      'title' => $child->post_title,
      'snippet' => $description,
      'image_attributes' => $image_attributes,
      'type' => $type,
      'classes' => $classes,
      'object' =>  $child->post_type,
      'object_id' => $child->ID,
    );

    $tag .= get_widget_entry_card_link_tag($atts);
  }

  $atts = array(
    'tag' => $tag,
    'type' => $type,
    'bold' => $bold,
    'arrow' => $arrow,
    'class' => $class,
  );

  $tag = get_navi_card_wrap_tag($atts);
  return $tag;
最後に、style.cssに以下を追記します。(ハイライト)
\cocoon-child-master\style.css
.navi-entry-cards-link-selected {
  background-color: rgba(225, 245, 254, 0.2) !important;
  border: 2px solid #4fc3f7 !important;
}結構長くなりましたが、実装はこれで完了です。
動作確認
管理画面の固定ページより、以下のように親子ページを作成しました。
ウィジェットはサイドバーに配置します。
親ページを表示してみましょう。
このように、ウィジェットに子ページの一覧が表示されました。
子ページを表示してみます。
表示されている固定ページのカードがハイライトされました。
設定はナビカードと同様ですので、カードの表示は変更することが出来ます。
ショートコードで子ページ一覧を表示
今回、ついでにショートコードでも動作するように対応しました。
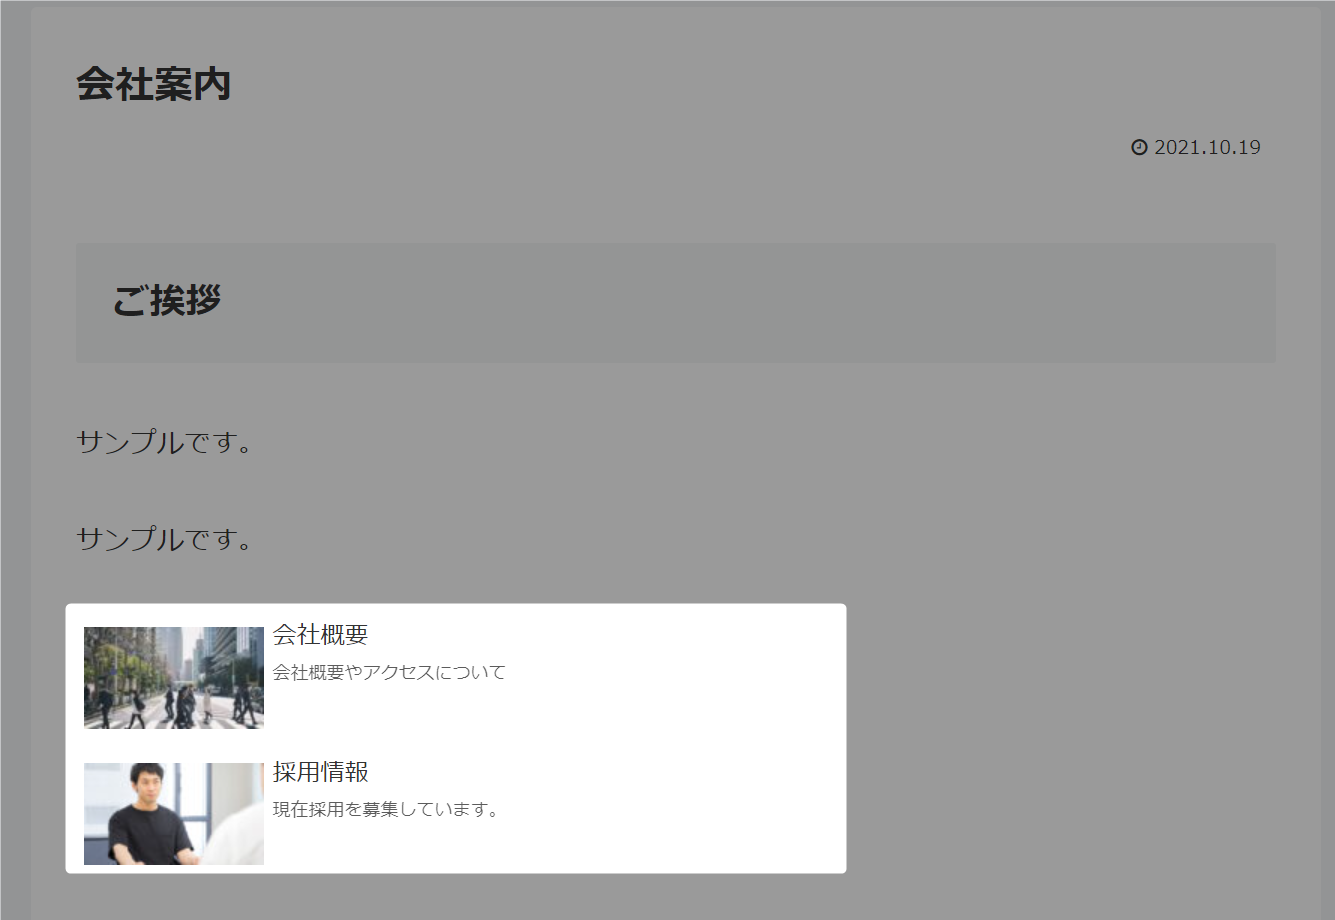
例えば、固定ページの本文中にショートコードを埋め込んでみます。
[child_page_list]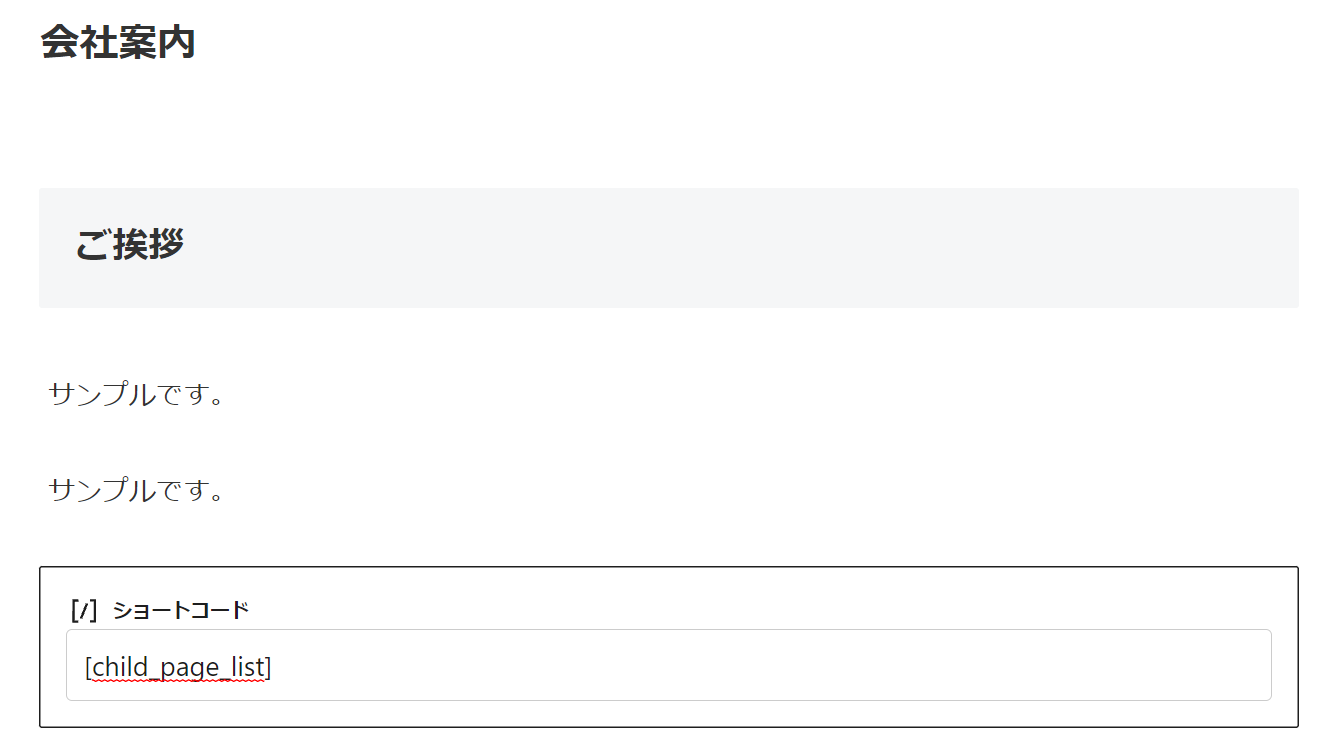
固定ページの本文の中に、子ページの一覧が表示されました。
ソース全容
functions.php
<?php //子テーマ用関数
if ( !defined( 'ABSPATH' ) ) exit;

//子テーマ用のビジュアルエディタースタイルを適用
add_editor_style();

//以下に子テーマ用の関数を書く

// 子ページを持っているかどうか
function has_children()
{
  global $post;
  $pages = get_pages('child_of=' . $post->ID);
  return count($pages) > 0;
}

// トップレベルのページかどうか
function is_top_level()
{
  global $post, $wpdb;
  $current_page = $wpdb->get_var("SELECT post_parent FROM $wpdb->posts WHERE ID = " . $post->ID);
  return $current_page == 0;
}

// 親ページのタイトルを取得
function get_parent_title()
{
  global $post, $wpdb;
  $post_title = $wpdb->get_var("SELECT post_title FROM $wpdb->posts WHERE ID = " . $post->post_parent);
  return $post_title;
}

// 子ページリスト ショートコード
add_shortcode('child_page_list', 'get_child_page_list_tag');
function get_child_page_list_tag($atts)
{

  extract(shortcode_atts(array(
    'type' => '',
    'bold' => 0,
    'arrow' => 0,
    'class' => null,
  ), $atts, 'child_page_list'));

  if (is_admin() && !is_admin_php_page()) {
    return;
  }

  // 固定ページのみ表示
  if (!is_page()) {
    return;
  }

  // 親ページのIDを取得
  global $post;
  $post_parent = -1;
  $is_top_level = is_top_level();
  if ($is_top_level && has_children()) {
    // 表示されているページが親ページで、さらに子ページを持っている場合
    // 表示されているページのIDを取得
    $post_parent = $post->ID;
  } else if (!$is_top_level) {
    // 子ページの場合、親ページのIDを取得
    $post_parent = $post->post_parent;
  } else {
    // それ以外の場合は何もしない
    return;
  }

  // 子ページの一覧を取得
  $children = get_posts(
    array(
      'post_parent' => $post_parent,
      'post_type'   => 'page',
      'orderby' => 'menu_order title',
      'order'   => 'ASC',
      // 件数を指定
      'posts_per_page' => 9999,
    )
  );

  if (!$children) {
    return;
  }

  $tag = null;
  foreach ($children as $child) {

    // 記事のディスクリプションを取得
    $description = get_the_page_meta_description($child->ID);

    // 画像取得用のパラメータ
    $img_obj = (object) [
      'object_id' => $child->ID,
      'object' => $child->post_type,
      'url' => get_permalink($child->ID),
    ];
    $image_attributes = get_navi_card_image_attributes($img_obj, $type);

    // 現在表示している固定ページIDとメニューが同じ場合はハイライトする
    $classes = array();
    if ($child->ID == $post->ID) {
      $classes[] = 'navi-entry-cards-link-selected';
    }

    // アイテムタグの取得
    $atts = array(
      'prefix' => WIDGET_NAVI_ENTRY_CARD_PREFIX,
      'url' => get_permalink($child->ID),
      'title' => $child->post_title,
      'snippet' => $description,
      'image_attributes' => $image_attributes,
      'type' => $type,
      'classes' => $classes,
      'object' =>  $child->post_type,
      'object_id' => $child->ID,
    );

    $tag .= get_widget_entry_card_link_tag($atts);
  }

  $atts = array(
    'tag' => $tag,
    'type' => $type,
    'bold' => $bold,
    'arrow' => $arrow,
    'class' => $class,
  );

  $tag = get_navi_card_wrap_tag($atts);
  return $tag;
}

// 子ページリスト ウィジェット
add_action('widgets_init', function () {
  register_widget('ChildPageWidgetItem');
});
class ChildPageWidgetItem extends WP_Widget
{

  // ウィジェット名などを設定
  function __construct()
  {
    parent::__construct(
      'child_pages',
      WIDGET_NAME_PREFIX . __('子ページカード', THEME_NAME),
      array('description' => __('子ページリストを表示するウィジェットです。', THEME_NAME)),
      array('width' => 400, 'height' => 350)
    ); //ウイジェット名
  }

  // ウィジェットの内容を出力
  function widget($args, $instance)
  {

    // 固定ページのみ表示
    if (!is_page()) {
      return;
    }

    // ウィジェットタイトルの取得
    $title = '';
    global $post;
    $is_top_level = is_top_level();
    if ($is_top_level && has_children()) {
      // 表示されているページが親ページで、さらに子ページを持っている場合
      // 表示されているページのタイトルを取得
      $title = $post->post_title;
    } else if (!$is_top_level) {
      // 子ページの場合、親ページのタイトルを取得
      $title = get_parent_title();
    } else {
      // それ以外の場合は何もしない
      return;
    }

    // タイトルの表示
    echo $args['before_widget'];
    echo $args['before_title'];
    echo $title;
    echo $args['after_title'];

    // 表示タイプ
    $entry_type = apply_filters('child_pages_widget_entry_type', empty($instance['entry_type']) ? ET_DEFAULT : $instance['entry_type']);
    // タイトルの太さ
    $is_bold = apply_filters('child_pages_widget_is_bold', empty($instance['is_bold']) ? 0 : 1);
    // 矢印表示
    $is_arrow_visible = apply_filters('child_pages_widget_is_arrow_visible', empty($instance['is_arrow_visible']) ? 0 : 1);

    // 引数配列のセット
    $atts = array(
      'type' => $entry_type,
      'bold' => $is_bold,
      'arrow' => $is_arrow_visible,
    );

    // リストの作成
    echo get_child_page_list_tag($atts);

    echo $args['after_widget'];

  }

  // ウィジェットオプションの保存処理
  function update($new_instance, $old_instance)
  {
    $instance = $old_instance;
    $instance['entry_type'] = strip_tags($new_instance['entry_type']);
    $instance['is_bold'] = isset($new_instance['is_bold']) ? 1 : 0;
    $instance['is_arrow_visible'] = isset($new_instance['is_arrow_visible']) ? 1 : 0;
    return $instance;
  }

  // 管理用のオプションのフォームを出力
  function form($instance)
  {
    if (empty($instance)) {
      $instance = array(
        'entry_type' => ET_DEFAULT,
        'is_bold' => 0,
        'is_arrow_visible' => 0,
      );
    }

    $entry_type  = ET_DEFAULT;
    if (isset($instance['entry_type']))
      $entry_type = esc_attr($instance['entry_type']);
    $is_bold = empty($instance['is_bold']) ? 0 : 1;
    $is_arrow_visible = empty($instance['is_arrow_visible']) ? 0 : 1;

    // 表示タイプ
    echo '<p>';
    generate_label_tag($this->get_field_id('entry_type'), __('表示タイプ', THEME_NAME));
    echo '<br>';
    $options = get_widget_entry_type_options();
    generate_radiobox_tag($this->get_field_name('entry_type'), $options, $entry_type);
    echo '</p>';

    // タイトルを太字にする
    echo '<p>';
    generate_checkbox_tag($this->get_field_name('is_bold'), $is_bold, __('タイトルを太字にする', THEME_NAME));
    echo '</p>';

    //矢印表示
    generate_checkbox_tag($this->get_field_name('is_arrow_visible'), $is_arrow_visible, __('矢印表示', THEME_NAME));
  }
}
style.css
@charset "UTF-8";

/*!
Theme Name: Cocoon Child
Description: Cocoon専用の子テーマ
Theme URI: https://wp-cocoon.com/
Author: わいひら
Author URI: https://nelog.jp/
Template:   cocoon-master
Version:    1.1.3
*/

/************************************
** 子テーマ用のスタイルを書く
************************************/
/*必要ならばここにコードを書く*/

.navi-entry-cards-link-selected {
  background-color: rgba(225, 245, 254, 0.2) !important;
  border: 2px solid #4fc3f7 !important;
}

/************************************
** レスポンシブデザイン用のメディアクエリ
************************************/
/*1023px以下*/
@media screen and (max-width: 1023px){
  /*必要ならばここにコードを書く*/
}

/*834px以下*/
@media screen and (max-width: 834px){
  /*必要ならばここにコードを書く*/
}

/*480px以下*/
@media screen and (max-width: 480px){
  /*必要ならばここにコードを書く*/
}
さいごに
Cocoonはとてもカスタマイズしやすく、スキンも沢山ありますので、様々なジャンルのサイトに対応できると思います。
本カスタマイズを追加すると、コーポレートサイトを作る際等に便利になると思います?
他にも私のブログで、WordPressについて解説している記事がありますのでご覧ください。


コメント