
はじめに
今回は、GitHubリポジトリへプッシュする手順をまとめました。
どんなファイルでもプロジェクトでも構いませんが、今回はLaravelプロジェクトをプッシュする手順をまとめました。
VS Codeを使うやり方と、Gitコマンドを使うやり方の2つを紹介します。
他にも私のブログで、Laravelについて解説している記事がありますのでご覧ください。


【紹介】個人開発
私の個人開発ですがQuiphaというサービスを開発しました。(Laravel, Vue3など)
良かったら、会員登録して動作を試してみて下さい。

また、Laravel 9 実践入門という書籍を出版しました。
Kindle Unlimitedを契約している方であれば、読み放題で無料でご覧いただくことができます。
VS Codeの用意
VS Codeのインストール方法は、以下の記事にまとめましたのでご覧ください。

設定方法は以下を参考にしてください。

プロジェクトの作成
適当なプロジェクトを作成します。
Sailでプロジェクトを作成しました、詳しくは以下の記事を参考にしてください。


以下のコマンドでプロジェクトを作成します。
curl -s https://laravel.build/example-laravel-github | bashGitのインストール
Windows
最新のGit for Windowsを使用する場合、特定の条件でうまく動作しない現象が発生しました。
詳しくは以下をご覧ください。

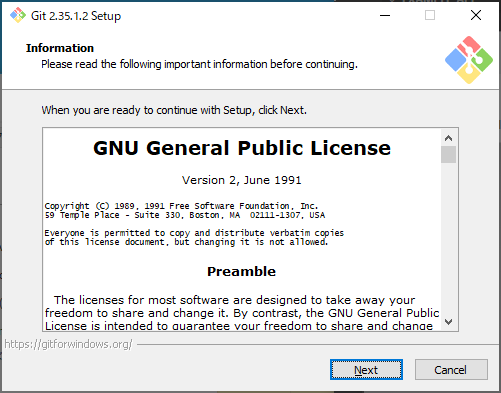
Git for Windows をインストールします。
下記のサイトから、インストーラをダウンロードし、インストールを行います。

インストーラを起動します。
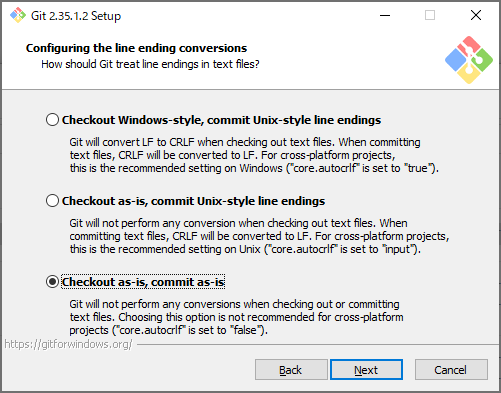
基本的にはオプションは変更せずに進めますが、以下の「改行」のオプションだけ変更しました。
インストールが完了しました。
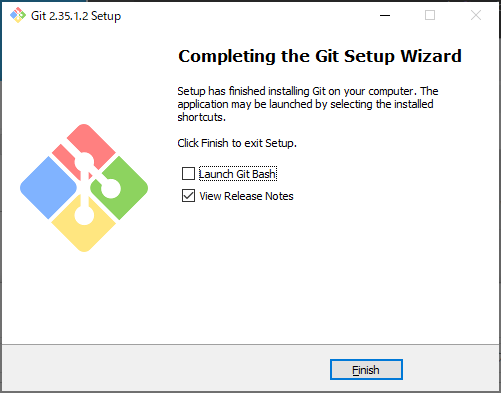
Git Bashを起動し、Git用のメールアドレスと名前を設定しておきましょう。
$ git config --global user.email "you@example.com"
$ git config --global user.name "Your Name"
ちなみに古いバージョンには脆弱性がありますので、必ず最新バージョンを利用しましょう。

Mac
ターミナルを起動し、以下のコマンドを実行します。
% git --version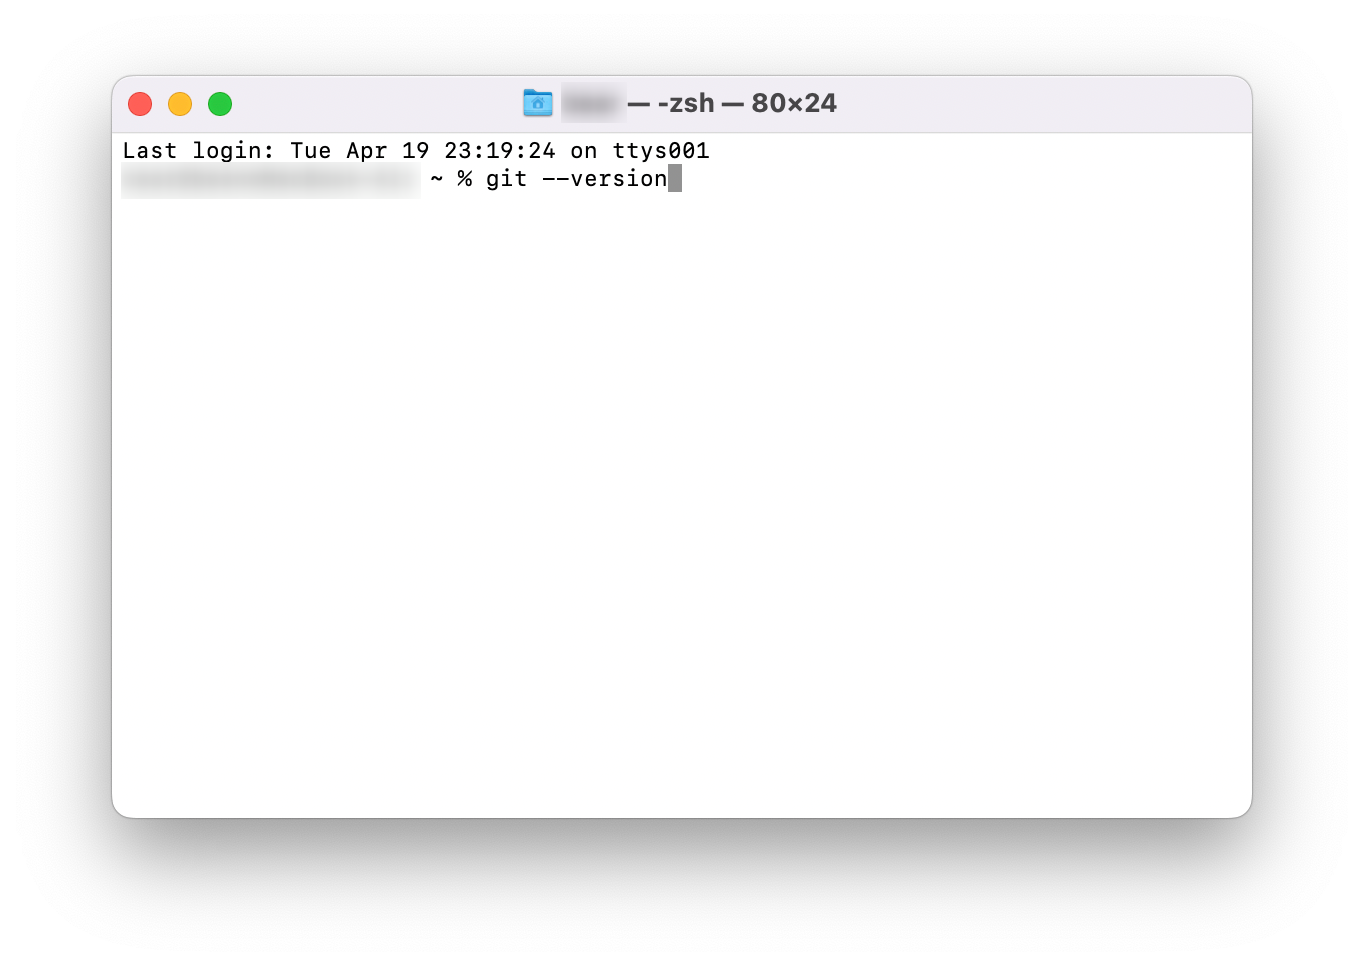
Gitがインストールされていない場合は、以下のダイアログが表示されますのでインストールを選択します。
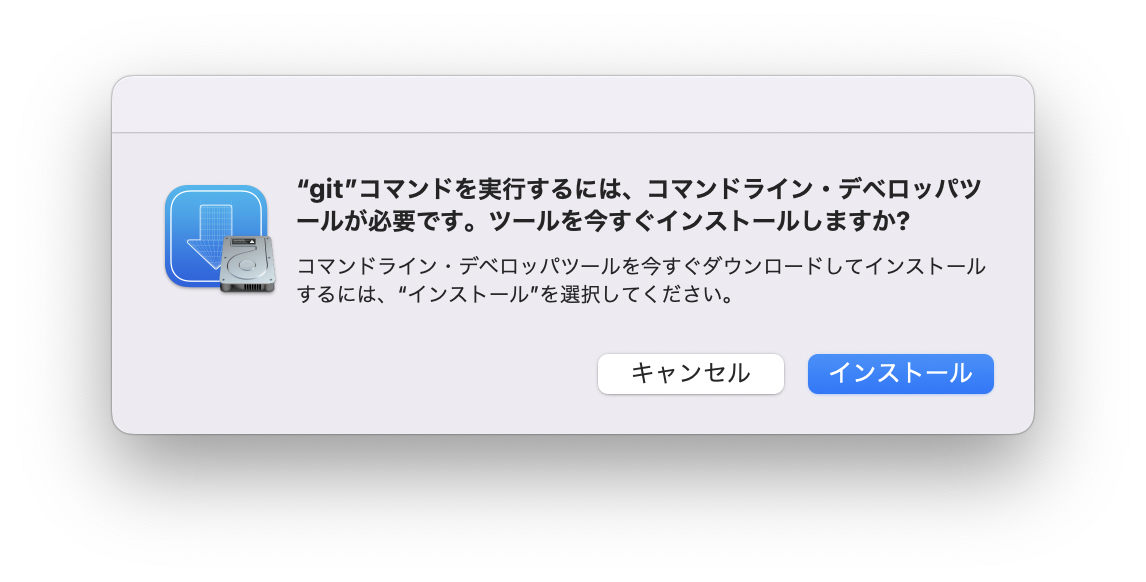
“git”コマンドを実行するには、コマンドライン・デベロッパツールが必要です。ツールを今すぐインストールしますか?
コマンドライン・デベロッパツールを今すぐダウンロードしてインストールするには、”インストール”を選択してください。
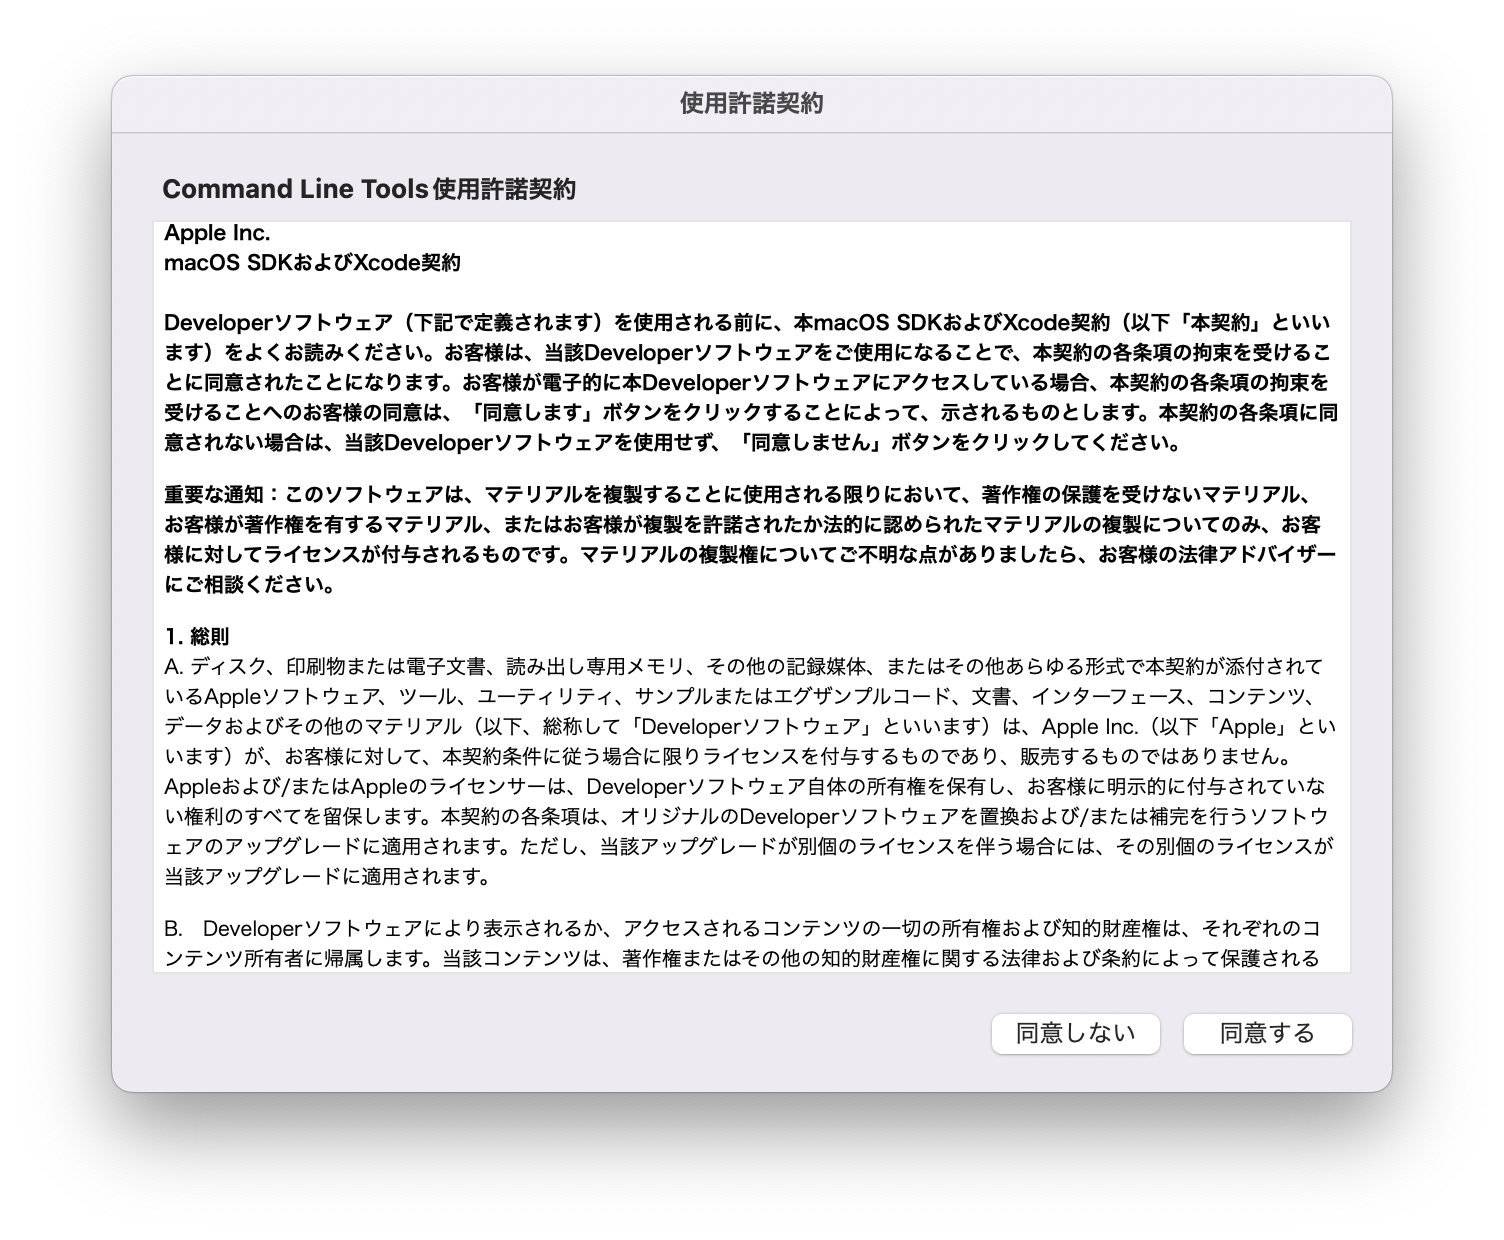
規約を確認します。
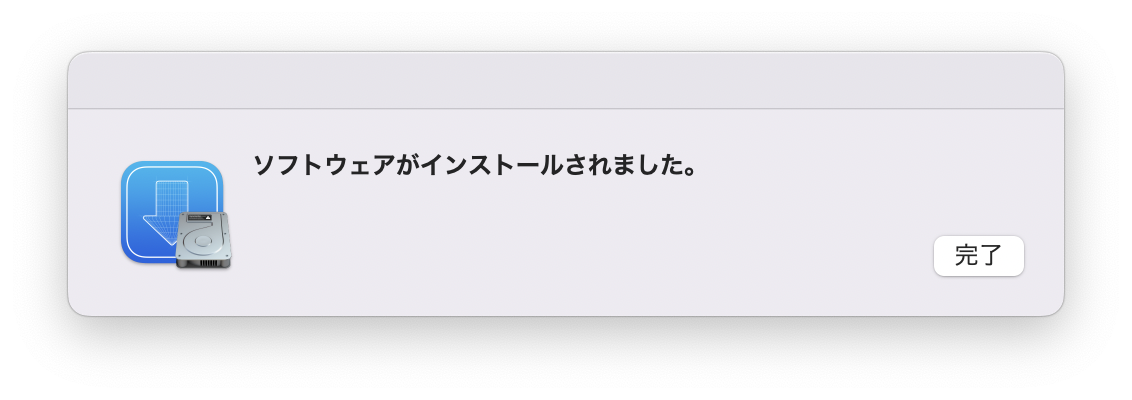
完了しました。
インストール完了後、以下のコマンドでGitのバージョンが確認できます。
% git --version

git version 2.30.1 (Apple Git-130)
Git用のメールアドレスと名前を設定しておきましょう。
% git config --global user.email "you@example.com"
% git config --global user.name "Your Name"
その1:VS Codeでプッシュ
プッシュ
VS CodeでGitHubへプッシュしてみましょう。
ソース管理を開き、GitHubに公開をクリックします。

以下のダイアログが表示されますので、「許可」をクリックします。
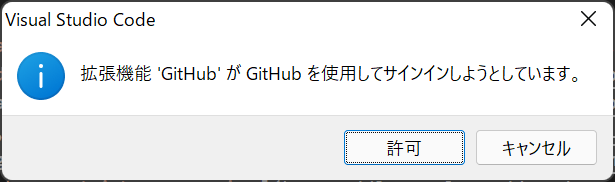
ちなみにMacの場合は以下のようなダイアログになります。
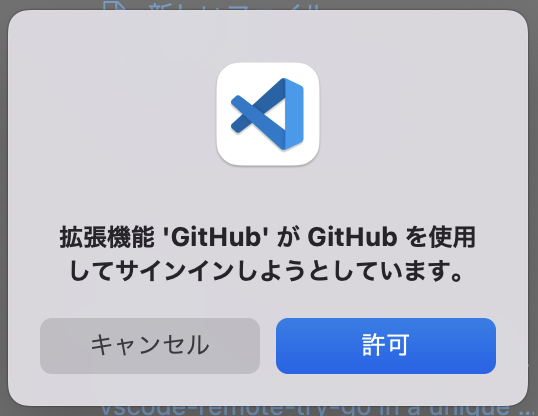
拡張機能 ‘GitHub’ が GitHub を使用してサインインしようとしています。
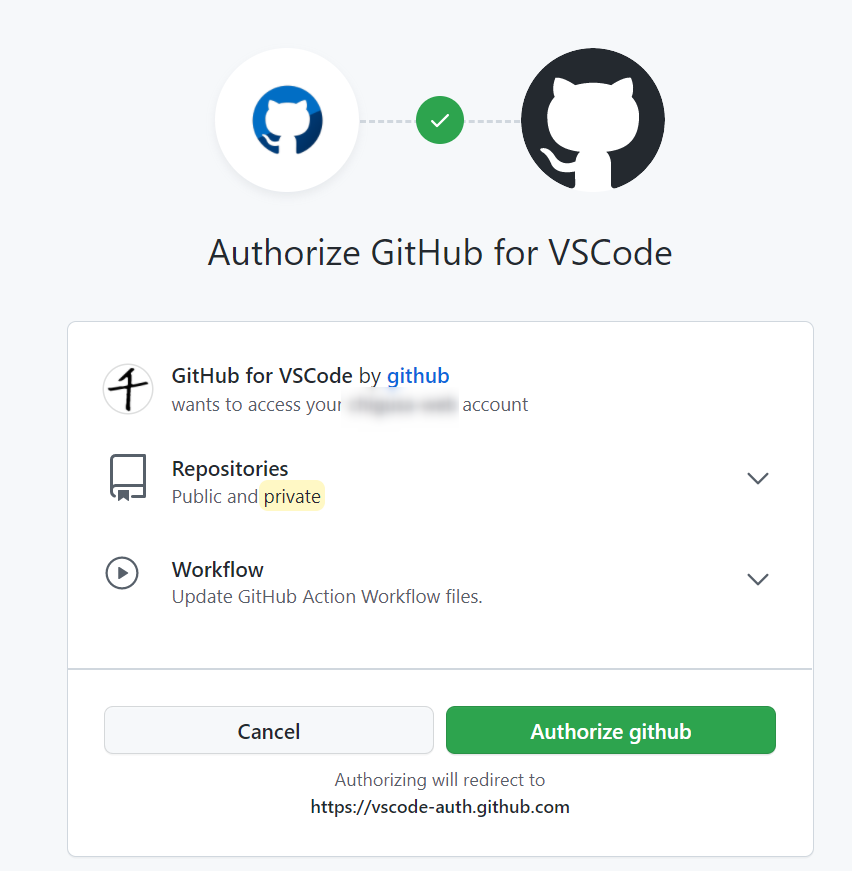
「Authorize Visual Studio Code to access GitHub」と表示されました。
Continueボタンをクリックします。

「Authorize github」ボタンをクリックし認証します。
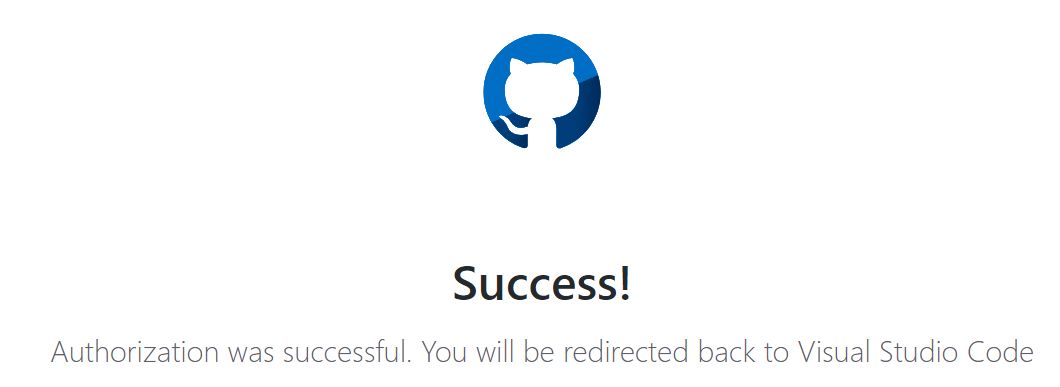
成功しました。
VS Codeに戻り、再度「GitHubに公開」ボタンをクリックすると、リストが選択できます。
それぞれ公開か、非公開かのリポジトリが選択できます。
今回は公開を選択しました。(下のpublicの方)

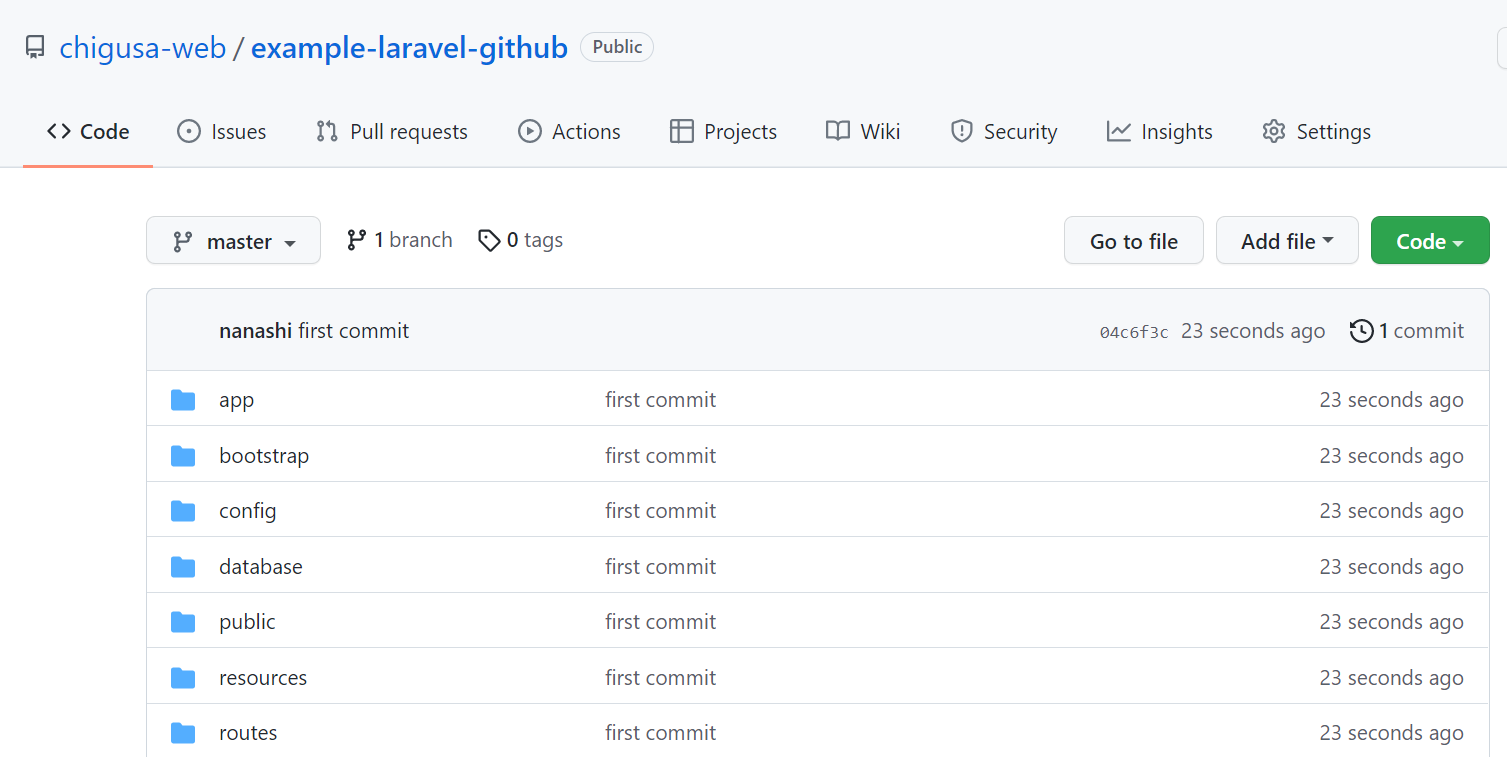
公開リポジトリが作成されました。
その2:GitHubにリポジトリを作成しGitコマンドでプッシュ
VS Codeを使わずに、Gitコマンドを使ってプッシュする手順です。
リポジトリ作成
事前にGitHubアカウントを作成しましょう。
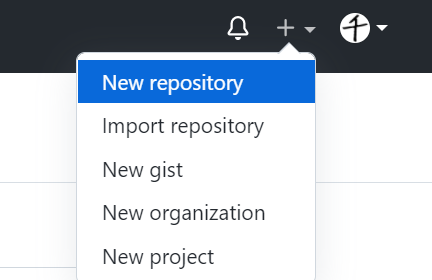
リポジトリを作成します。New repositoryを選択します。
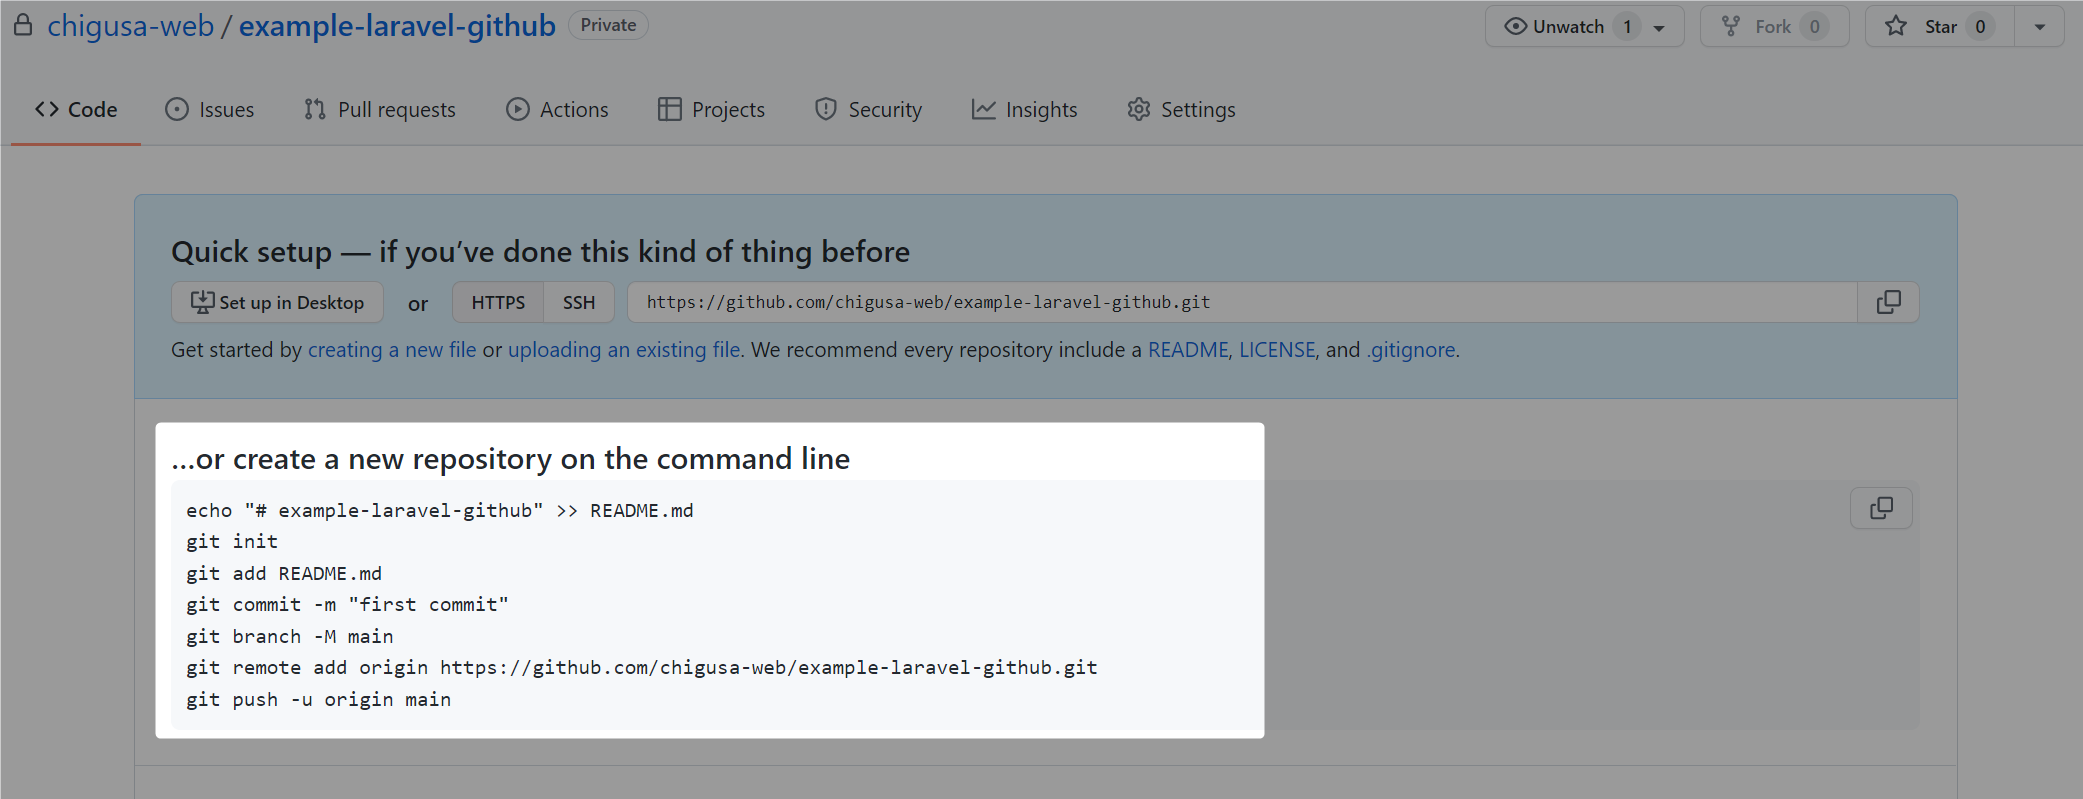
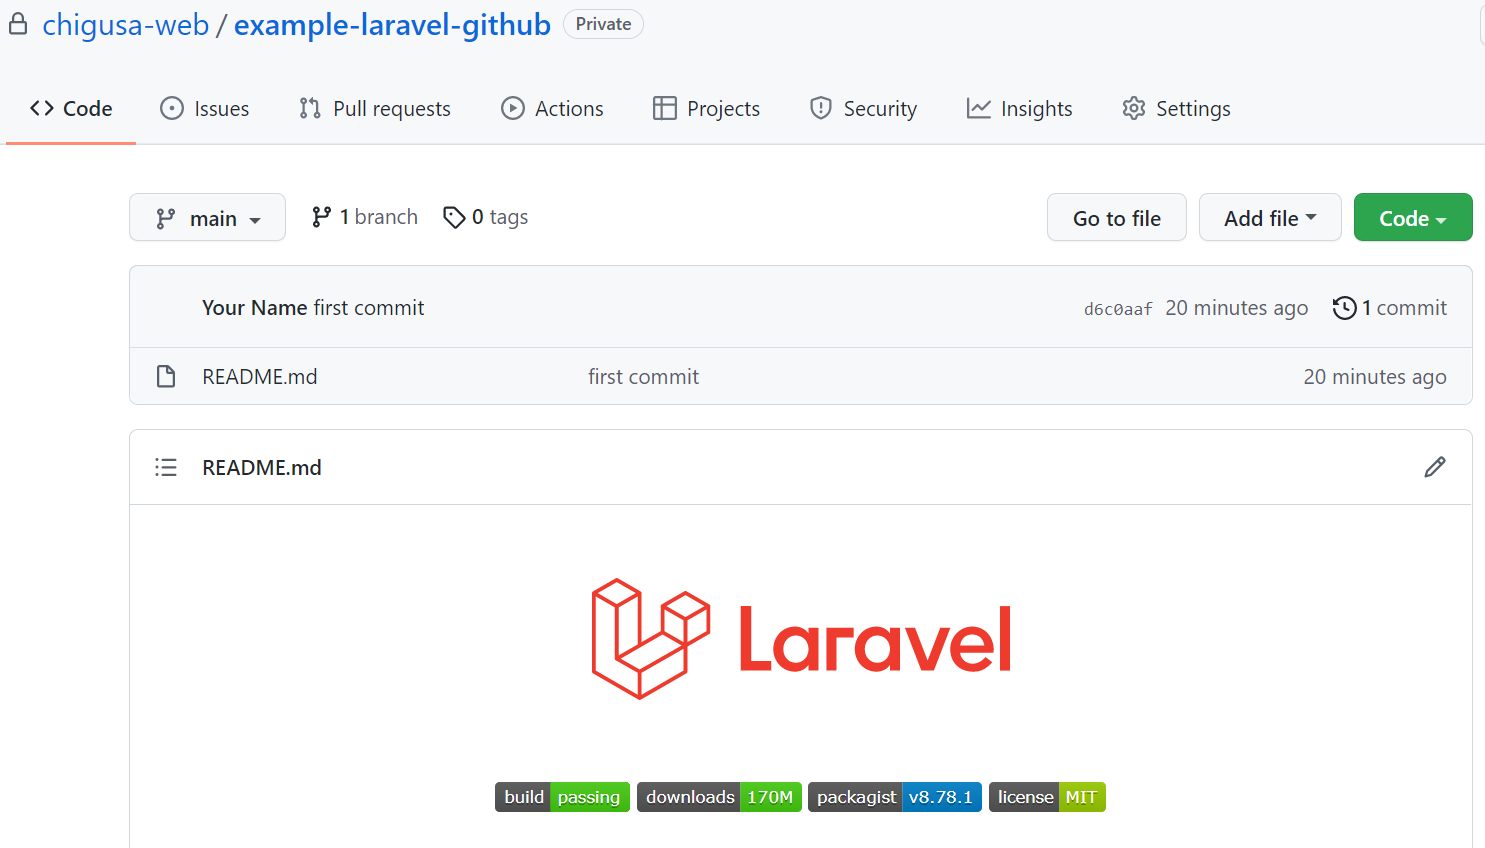
以下のようにリポジトリを作成しました。
今回はプライベートリポジトリとしました。

GitHubのリポジトリの初期画面が表示されました。
今回は、Laravelのプロジェクトファイルがすでに存在するため、以下の手順を行います。
プッシュ
先程作成したLaravelプロジェクトの直下で、以下のコマンドを実行します。
URLは各自のリポジトリのものに読み替えてください。
エラーが出る場合は、この後の手順をご確認ください。
cd example-laravel-github/

git init
git add README.md
git commit -m "first commit"
git branch -M main
git remote add origin https://github.com/chigusa-web/example-laravel-github.git
git push -u origin mainコミット時のエラーについて
git commitコマンドを実行する際に以下のエラーが出る場合があります。
*** Please tell me who you are.

Run

  git config --global user.email "you@example.com"
  git config --global user.name "Your Name"

to set your account's default identity.
Omit --global to set the identity only in this repository.

fatal: empty ident name (for <xxx@xxx>) not allowed
その場合は、以下のコマンドで設定してください。
(メールアドレスと名前は任意)
git config --global user.email "you@example.com"
git config --global user.name "Your Name"プッシュ時のエラーについて
プッシュ時に以下のエラーが出る場合があります。
GitHubはパスワード認証を廃止したためです。
Username for 'https://github.com': xxx
Password for 'https://xxx@github.com':
remote: Support for password authentication was removed on August 13, 2021. Please use a personal access token instead.
remote: Please see https://github.blog/2020-12-15-token-authentication-requirements-for-git-operations/ for more information.
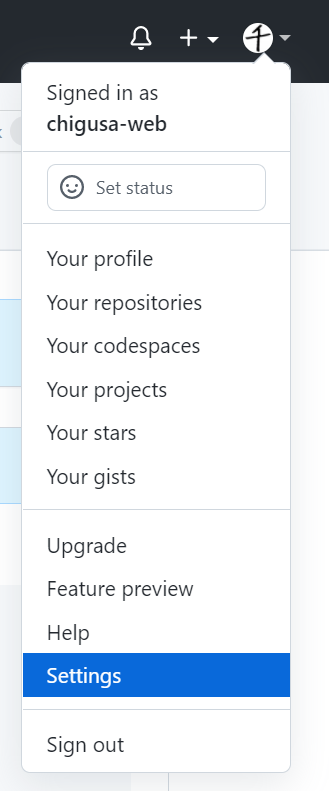
fatal: Authentication failed for 'https://github.com/chigusa-web/example-laravel-github.git/'GitHubのアカウントのSettingsを開きます。
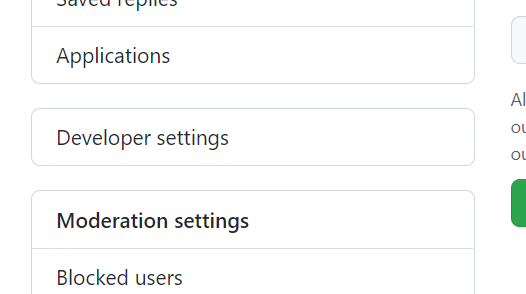
左サイドバーでDeveloper settingsをクリックします。
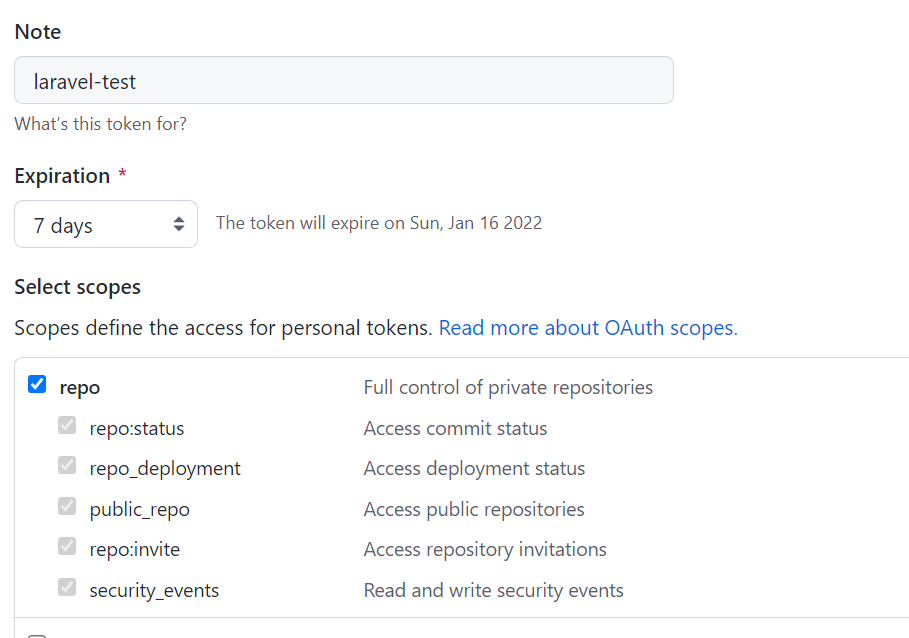
Personal access tokensを選択し、「Generate new token」をクリックします。

名前は任意で、期限は短くしました。
スコープはrepoを選択しました。
トークンが表示されますのでコピーします。
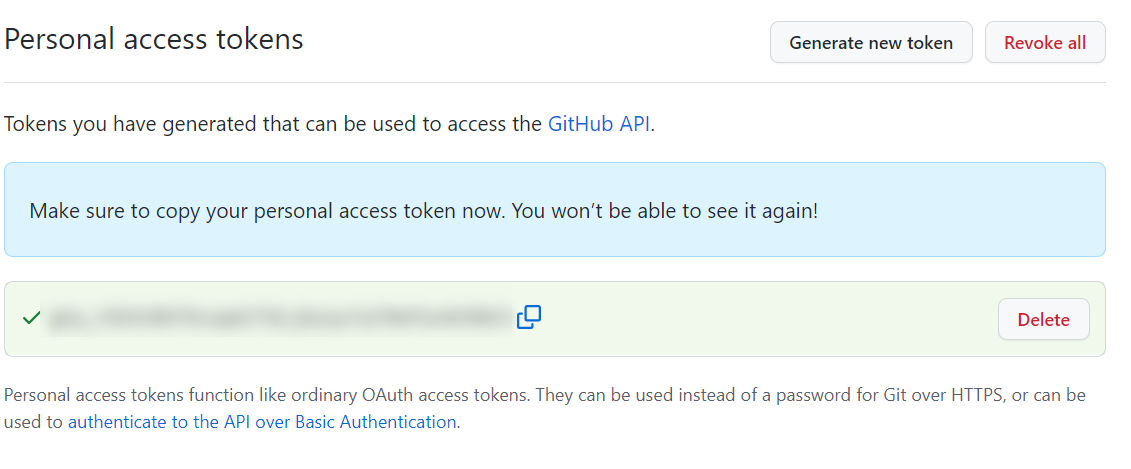
git push時のログイン情報のパスワードとして、先程のトークンを入力します。
Username for 'https://github.com': xxx
Password for 'https://xxx@github.com':
作成したGitHubリポジトリにプッシュできました。
クローン
クローンのやり方については、以下の記事にまとめました。

さいごに
今回はLaravelプロジェクトをGitHubへプッシュする手順をまとめました。
是非活用しましょう。
他にも私のブログで、Laravelについて解説している記事がありますのでご覧ください。


コメント